web前端复习笔记
因为老师给的笔记分散在多个文件夹,用百度翻译出来的结果经常不准,所以我在一怒之下怒了一下决定将所有的笔记归类到一篇文章中,并且将其中的一些难以理解的术语用大白话说出来
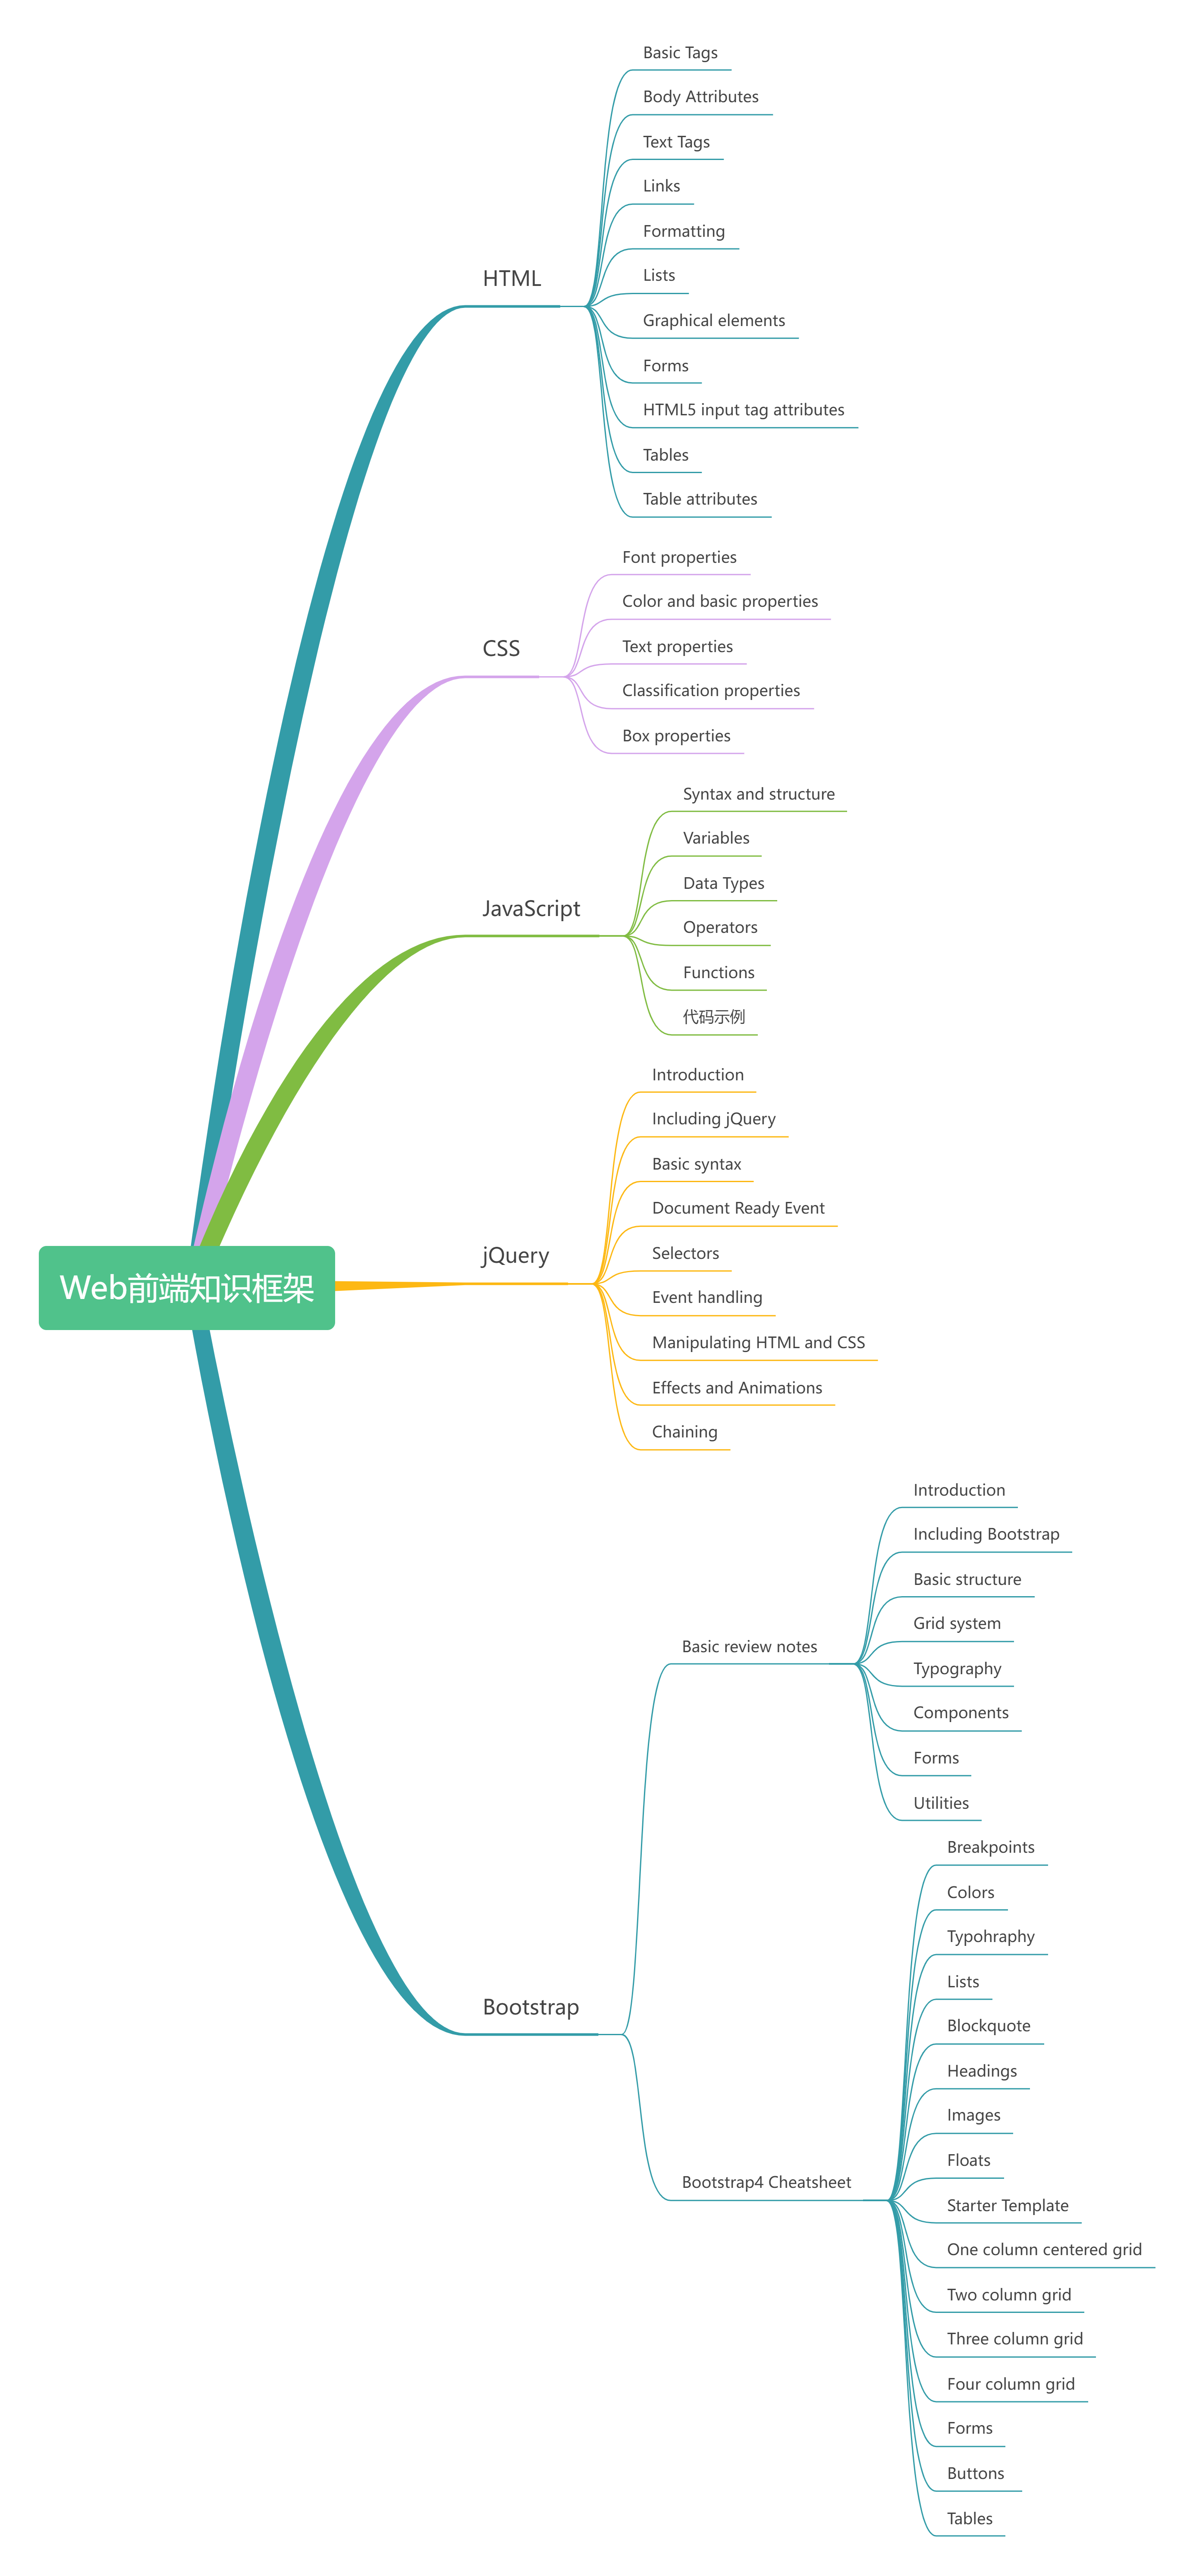
先上思维导图(你们应该能理解我有多肝了)
0. 写在开头
开始之前,我想先说一下html,css,Bootstrap,Javascript,Query之间的关系
- HTML(HyperText Markup Language)是网页的基础,它定义了网页的结构和内容。你可以把它想象成建筑的骨架,决定了建筑的基本形状和内部空间的布局。
- CSS(Cascading Style Sheet)是用来设置网页的样式的,包括布局、颜色、字体等。它的作用类似于建筑的装修,通过它可以使基本的建筑看起来更美观、更符合使用需求。
- Bootstrap是基于 HTML 和 CSS 的一个框架,它提供了预制的样式和组件,使网页设计变得更快、更容易。想象一下,如果有一个预装好家具和装饰的房间,你只需要进行一些小的调整就能入住,这就是 Bootstrap 的作用。
- JavaScript是一种脚本语言,用于添加网页的交互功能,比如响应按钮点击、数据更新等。如果把网页比作一部电影,那么 JavaScript 就是让静态画面动起来的电影导演。
- jQuery是一个 JavaScript 库,它简化了 JavaScript 的编程,使 DOM 的操作、事件处理和动画效果的实现更加容易。使用 jQuery 就像是为电影导演提供了一套高效的工具,使拍摄过程更加顺畅。
想象你在建造一个现代住宅(网页)。首先,你需要一个结构图(HTML),它定义了房子的基本布局和每个房间的位置。接着,你需要进行内部装修(CSS),决定墙壁的颜色、地板的材质和房间的灯光等。然后,为了让装修更快更方便,你选择了一套现成的装修套餐(Bootstrap),这套套餐已经包括了一些流行的设计和家具。
现在房子看起来很好,但如果要住得舒适,你还需要添加一些高科技设备,比如自动窗帘、温度调节器等(JavaScript),使房子可以根据居住者的行为自动调整环境。最后,为了简化这些高科技设备的安装和使用,你引入了一个智能家居系统(jQuery),它可以帮你更容易地控制这些设备,让你的智能家居体验更加无缝和愉快。
1. HTML Cheatsheet(HTML工作表)
1.1 Basic Tags
<html></html>:Creates an HTML document
创建HTML文档<head></head>:Sets off the title & other info that isn's displayed
用来标记网页标题和其他不会直接显示的内容(这里的set off可以理解为标记或设定)<body></body>:Sets off the visible portion of the document
用来标记文档可见部分<title></title>:Puts name of the document in the title bar;when bookmarking pages,this is what bookmarked
文档的标题会显示在浏览器的标题栏或标签页上,当用户为页面添加书签时,这个标题也是被保存的内容。(bookmark:书签)
1.2 Body attributes[Only used in email newsletters(仅用于电子邮件通讯)]
<body bgcolor=?>:Sets background color,using name or hex value
设置背景颜色,使用名称或十六进制值<body text=?>:Sets text color,using name or hex value
设置文本颜色,使用名称或十六进制值<body link=?>:Sets color of links,using name or hex value
设置链接颜色,使用名称或十六进制值<body vlink=?>:Sets color of visited links,using name or hex calue
设置已访问链接的颜色,使用名称或十六进制值<body alink=?>:Sets color of active links (while mouse-clicking)
设置活动链接的颜色(鼠标点击时)
小贴士(不赶时间可以看看): 使用名称或十六进制值是指在指定颜色时,可以使用颜色的名称或其对应的十六进制值 使用名称,比如
red,blue,green等等 使用十六进制时,每种颜色都可以用一个六位的十六进制代码来表示,代码前加上#,比如#FF0000(红色),#0000FF(蓝色),#00FF00(绿色),#000000(黑色),#FFFFFF(白色) 十六进制值由三个部分组成,分别表示红色、绿色和蓝色(RGB),每部分用两位十六进制数表示。比如,#FF0000 代表红色,因为 FF 表示最大值 255,对应于红色,而绿色和蓝色的值为 0。
1.3 Text Tags(文本标签)
<pre></pre>:Creates preformatted text
创建预格式化文本
大白话:使用<pre>标签可以确保文本的格式不会被浏览器自动调整,非常适合需要保持原始格式的内容<h1></h1>--><h6></h6>:Creates headlines -- H1=largest, H6=smallest
创建标题,h1最大,h6最小<b></b>:Creates bold text (should use<strong>instead)
创建粗体文本(创建粗体文本(应该使用<strong>代替))<i></i>:Creates italicized text (should use<em>instead)
创建斜体文本(应该使用<em>代替)<tt></tt>:Creates typewriter-style text
创建打字机风格的文本<code></code>:Used to define source code, usually monospace
用于定义源代码,通常为等宽字体<cite></cite>:Creates a citation, usually processed in italics
创建引用,通常为斜体<address></address>:Creates address section, usually processed in italics
创建地址部分,通常为斜体<em></em>:Emphasizes a word (usually processed in italics)
强调一个词(通常为斜体)<strong></strong>:Emphasizes a word (usually processed in bold)
强调一个词(通常为粗体)<font size=?></font>:Sets size of font - 1 to 7 (should use CSS instead)
设置字体大小 - 1 到 7(应该使用 CSS 代替)<font color=?></font>:Sets font color (should use CSS instead)
设置字体颜色(应该使用 CSS 代替)<font face=?></font>:Defines the font used(should use the CSS instead)
定义所使用的字体(应该使用 CSS 代替)
1.4 Links
<a href="URL">clickable text</a>:Creates a hyperlink to a Uniform Resource Locator
创建一个指向统一资源定位符(URL)的超链接<a href="mailto:EMAIL_ADDRESS">clickable text</a>:Creates a hyperlink to an email address
创建一个指向电子邮件地址的超链接<a name="NAME">:Creates a target location within a document
在文档内创建一个目标位置<a href="#NAME">clickable text</a>:Creates a link to that target location
创建一个指向该目标位置的链接
大白话:创建一个指向该目标位置的链接。点击此链接时,页面会滚动到相应的锚点目标位置
小贴士: 超链接(Hyperlink)是指在网页或文档中,能够从一个页面或位置跳转到另一个页面或位置的链接。通过点击超链接,用户可以快速导航到指定的目标,例如另一个网页、同一页面中的特定位置、电子邮件地址或文件。 超链接通常以不同的颜色或下划线显示,提示用户可以点击它们。超链接使用 HTML 中的
<a>(anchor)标签来创建。 href是"Hypertext Reference"的缩写。在 HTML 中,href 属性用于指定超链接的目标地址。通过为<a>标签设置 href 属性,可以定义用户点击链接时应该跳转到的目标位置。 URL是"Uniform Resource Locator"的缩写,中文常译为“统一资源定位符”。URL 是一种用于指定互联网上某一资源位置的地址,类似于我们在现实生活中使用的地址来找到特定位置。URL可以是网址(比如https://crazythursdayv50tome.cn)也可以是路径(比如"/path/to/resource")等
1.5 Formatting(格式化)
<p></p>:Creates a new paragraph
创建一个新段落<br>:Inserts a line break(carriage return)
插入一个换行符(回车)<blockquote></blockquote>:Puts content in a quote-indents text from both sides
将内容放在引号中-将文本从两边缩进
大白话:<blockquote>标签用于表示引用的内容,浏览器通常会对其进行缩进处理以突出显示引用的部分。这种标记常用于显示他人的言论或引用的文本,以便与正文区分开来。通常,浏览器会在左右两侧添加一些空白来使引用部分与周围内容有所区别。<div></div>:Used to format block content with CSS
用于使用 CSS 格式化块级内容<span></span>:Used to format inline content with CSS
用于使用 CSS 格式化内联内容<span>标签用于对文本中的一部分进行行内样式控制,通常用于对文本进行格式化或添加样式而不影响其它文本。它类似于<div>,但<span>是行内元素,而<div>是块级元素,所以<span>通常用于对文本的一部分进行样式设置,例如改变颜色、字体、大小等。
打个比方,<span>标签就像是一个装饰盒,你可以把它放在文字中任何你想要装饰的地方。比如,你可以用<span>来给文字涂上不同的颜色、改变字体大小或者添加特殊效果,而不会影响到其他文字。就像给一小块文字打扮一样,不会影响到整个段落的装扮。1
<p>这是一段 <span style="color: red;">红色</span> 的文字。</p>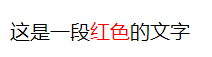
1.6 Lists(列表)
<ul></ul>:Creates an unordered list
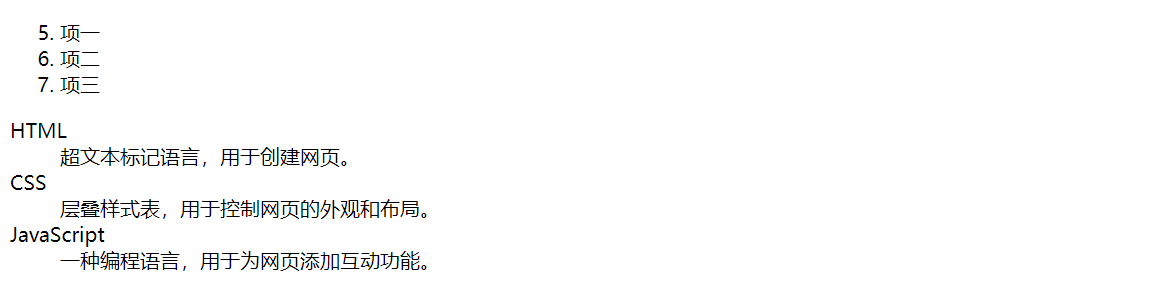
创建一个无序列表<ol start=?></ol>:Creates an ordered list (start=xx, where xx is a counting number)
创建一个有序列表(start=xx,其中 xx 是一个计数数字)
xx 可以是任意整数,表示列表从这个编号开始。默认情况下,有序列表从 1 开始编号,但通过设置 start 属性,可以更改起始编号。<li></li>:Encompasses each list item
包围每个列表项<dl></dl>:Creates a definition list
创建一个定义列表<dt></dt>:Precedes each definition term
在每个定义术语之前<dd></dd>:Precedes each definition
在每个定义之前
没听懂?没关系,举个例子你就明白了
1 | |
1.7 Graphical elements(图形元素)
<hr>:Inserts a horizontal rule
插入一个水平线<hr size=?>:Sets size (height) of horizontal rule
设置水平线的高度<hr width=?>:Sets width of rule(as a % or absolute pixel length)
设置水平线的宽度(可以是百分比或绝对像素长度)<hr noshade>:Creates a horizoontal rule without a shadow
创建一个没有阴影的水平线<img src="URL" />:Adds image; it is a separate file located at the URL
添加图像;它是一个位于指定 URL 的单独文件<img src="URL" />标签中的 / 是自闭合标签的写法。这种写法主要源于 XHTML 规范,在 XHTML 中,所有标签都必须正确关闭,即使是那些在 HTML 中不需要关闭的空元素(例如<img>、<br>、<hr>等)。<img src="URL" align=?>:Aligns image left/right/center/bottom/top/middle (use CSS)
将图像左对齐/右对齐/居中对齐/底部对齐/顶部对齐/中间对齐(建议使用 CSS)<img src="URL" border=?>:Sets size of border surrounding image (use CSS)
设置图像周围边框的大小(建议使用 CSS)<img src="URL" height=?>:Sets height of image, in pixels
设置图像的高度(单位为像素)<img src="URL" width=?>:Sets width of image, in pixels
设置图像的宽度(单位为像素)<img src="URL" alt=?>:Sets the alternate text for browsers that can't process images (required by the ADA)
为无法处理图像的浏览器设置替代文本(ADA 要求)
1.8 Forms(表单)
<form></form>:Defines a form
定义一个表单<select multiple name=? size=?></select>:Creates a scrolling menu. Size sets the number of menu items visible before user needs to scroll.
创建一个滚动菜单。size设置用于需要滚动前可见的菜单项数量<select name=?></select>:Creates a pulldown menu
创建一个下拉菜单<option>:Sets off each menu item
设置每个菜单项<textarea name=? col="x" rows="y"></textarea>:Creates a text box area. Columns set the width; rows set the height.
创建一个文本区域。cols 设置宽度;rows 设置高度。<input type="checkbox" name=? value=?>:Creates a checkbox.
创建一个复选框。<input type="checkbox" name=? value=? checked>:Creates a checkbox which is pre-checked
创建一个预选中的复选框。<input type="radio" name=? value=?>:Creates a radio button.
创建一个单选按钮<input type="radio" name=? value=? checked>:Creates a radio button which is pre-checked.
创建一个预选中的单选按钮。<input type="text" name=? size=?>:Creates a one-line text area. Size sets length, in characters.
创建一个单行文本区域。size 设置长度,以字符为单位。<input type="submit" value=?>:Creates a submit button. Value sets the text in the submit button.
创建一个提交按钮。value 设置提交按钮上的文本。<input type="image" name=? src=? border=? alt=?>:Creates a submit button using an image.
使用图像创建一个提交按钮。<input type="reset">:Creates a reset button
创建一个重置按钮
1.9 HTML5 input tag attributes[HTML5 输入标签属性(不是所有浏览器都支持;请访问 http://caniuse.com 获取详细信息)]
<input type="email" name=?>:Sets a single-line textbox for email addresses
设置一个用于电子邮件地址的单行文本框<input type="URL" name=?>:Sets a single-line textbox for URLs
设置一个用于 URL 的单行文本框<input type="number" name=?>:Sets a single-line textbox for a number
设置一个用于数字的单行文本框<input type="range" name=?>:Sets a single-line text box for a range of numbers
设置一个用于范围数字的单行文本框<input type="date/month/week/time" name=?>:Sets a single-line text box with a calendar showing the date/month/week/time
设置一个带有日历的单行文本框,显示日期/月份/周/时间<input type="search" name=?>:Sets a single-line text box for searching
设置一个用于搜索的单行文本框<input type="color" name=?>:Sets a single-line text box for picking a color
设置一个用于选择颜色的单行文本框
1.10 Tables(use only for data layout -use CSS for page layout)[表格(仅用于数据布局 - 使用 CSS 进行页面布局)]
<table></table>:Creates a table
创建一个表格<tr></tr>:Sets off each row in a table
设置表格中的每一行<td></td>:Sets off each cell in a row
设置每行中的每个单元格
td:table data<th></th>:Sets off the table header(a normal cell with bold,centeered text)
设置表头(一个普通单元格,其中的文本加粗且居中显示)
1.11 Table attributes(only use for email newsletters)[表格属性(仅用于电子邮件新闻简报)]
<table border=?>:Sets the width of the border around table cells
设置单元格周围边框的宽度<table cellspacing=?>:Sets amount of space between table cells
设置表格单元格之间的间距<table cellpadding=?>:Sets amount of space between a cell's border and its contents
设置单元格边框和内容之间的间距<table width=?>:Sets width of the table in pixels or as a percentage
设置表格的宽度,单位可以是像素或百分比<tr align=?>:Sets alignment for cells within the roe(left/center/right)
设置行内单元格的对齐方式(左对齐/居中/右对齐)<td align=?>:Sets alignment for cells within the row (left/center/right)
设置单元格的对齐方式(左对齐/居中/右对齐)<tr valign=?>:Sets vertical alignment for cells within the row (top/middle/bottom)
设置行内单元格的垂直对齐方式(顶部对齐/居中/底部对齐)<td valign=?>:Sets vertical alignment for cell (top/middle/bottom)
设置单元格的垂直对齐方式(顶部对齐/居中/底部对齐)<td rowspan=?>:Sets number of rows a cell should span (default=1)
设置单元格应跨越的行数(默认为1)<td colspan=?>:Sets number of columns a cell should span
设置单元格应跨越的列数<td nowrap>:Prevents lines within a cell from being broken to fit
防止单元格内部的文本换行以适应
2. Cascading Style Sheets Cheatsheet(层叠样式表速查表)
2.1 Font Properties(字体属性)
Font Family:Changes the font family of certain words, sentences,paragraphs, etc.
更改特定单词、句子、段落等的字体系列。1
P { font-family: "New Century Schoolbook", Times, serif; }Font Style:Changes text: normal, oblique, and italics.
更改文本的样式:正常、斜体、和斜体字。1
2H1 { font-style: oblique; }
P { font-style: normal; }Font-Variant:Used to display font in normal or small-caps.
用于显示正常字体或小型大写字体。1
span{font-variant: small-caps}Font-Weight:Used to specify the weight of the font.
用于指定字体的粗细1
2h1 {font-weight: 800;}
p {font-weight:normal;}Font-Size:Used to modify the size of the displayed font.
用于修改显示字体的大小。1
2
3
4h1 { font-size: large; }
p { font-size: 12pt; }
li { font-size: 90%; }
strong { font-size: larger; }Font:Used to combine all properties of fonts
用于组合所有字体属性1
p { font: italic bold 12pt/14pt Times, serif; }
2.2 Color and Background Properties(颜色和背景属性)
Color:Changes the color of text
更改文本的颜色。1
2h1 {color: blue};
h2 {color: #000000};Background-Color:Sets the background color of an element.
设置元素的背景颜色。1
2BODY { background-color: white; }
H1 { background-color: #000080; }Background-Image: Sets the background image of an element
设置元素的背景图片。1
2BODY { background-image: url(/images/foo.gif); }
P { background-image: url(http://www.htmlhelp.com/bg.png); }Background-Repeat:Determines how a specified background image is repeated. The repeat-x value will repeat the image horizontally while the repeat-y value will repeat the image vertically.
确定指定的背景图像如何重复。repeat-x 值将图像水平重复,而 repeat-y 值将图像垂直重复。1
BODY { background: white url(candybar.gif); background-repeat: repeat-x; }Background-Attachment:Determines if a specified background image will scroll with the content or be fixed with regard to the canvas.
确定指定的背景图像是随着内容滚动还是相对于画布固定。1
BODY { background: white url(candybar.gif); background-attachment: fixed; }Background:Used to combine all properties of background
用于组合所有背景属性。1
2
3
4BODY { background: white url(http://www.htmlhelp.com/foo.gif); }
BLOCKQUOTE { background: #7fffd4; }
P { background: url(../backgrounds/pawn.png) #f0f8ff fixed; }
TABLE { background: red url(leaves.jpg) no-repeat bottom right; }
2.3 Text Properties(文本属性)
Word-Spacing:Defines an additional amount of space between words.
定义单词之间的额外间距。1
2
3P EM { word-spacing: 0.4em; }<!--表示所有嵌套在 <p> 标签内的 <em> 标签,即 <p> 元素中的 <em> 元素。
-->
P.note { word-spacing: -0.2em; }<!--表示所有带有 class="note" 的 <p> 标签。-->Letter-Spacing:Defines an additional amount of space between characters.
定义字符之间的额外间距。1
2H1 { letter-spacing: 0.1em; }
P.note { letter-spacing: -0.1em; }Text-Decoration:Allows text to be decorated through one of five properties:underline, overline, line-through, blink, none.
允许通过以下五个属性之一装饰文本:下划线(underline)、上划线(overline)、删除线(line-through)、闪烁(blink)、无(none)。1
2
3
4
5
6
7
8
9A:link, A:visited, A:active { text-decoration: none; }
<!--
A:link:表示未访问过的链接(普通状态)。
A:visited:表示用户已经访问过的链接。
A:active:表示用户正在点击的链接(激活状态)
{ text-decoration: none; }:表示移除这些链接的默认文本装饰(通常是下划线)。
对于所有未访问过的链接(A:link),已经访问过的链接(A:visited),和正在点击的链接(A:active),都不显示文本装饰(例如下划线)。
换句话说,这行代码将移除所有状态下的超链接的默认下划线效果,使其看起来像普通文本
-->Vertical-Align:Used to alter the vertical positioning of an inline element,relative to its parent element or to the element's line.
用于相对于父元素或元素的行,改变内联元素的垂直位置1
2
3IMG.middle { vertical-align: middle; }
IMG { vertical-align: 50%; }
.exponent { vertical-align: super; }Text-Transform:Allows for capitalizing the first letter of each word (capitalize),capitalizing all letters of a word (uppercase), using all small letters in each word(lowercase), and the inital value(none).
允许将每个单词的首字母大写(capitalize),将所有字母大写(uppercase),将每个单词的所有字母小写(lowercase),以及初始值(none)。1
2H1 { text-transform: uppercase }
H2 { text-transform: capitalize }Text-Align:Used to justify text left, center, right, and justify.
用于将文本左对齐、居中对齐、右对齐和两端对齐。1
2H1 { text-align: center; }
P.newspaper { text-align: justify; }Text-Indent:Used to specify the amount of indentation prior to the first line of text.
用于指定文本第一行的缩进量。1
P { text-indent: 5em; }Line-Height:Used to control the spacing between baselines of text.
用于控制文本基线之间的间距。1
P { line-height: 200%; }
2.4 Classification Properties(分类属性)
List-Style-Type:Specifies the type of list-item marker,and is used if list-style-image is none or if image loading is turned off.
指定列表项标记的类型,如果 list-style-image 为 none 或者图像加载被关闭时使用。
大白话:list-style-type 属性用来指定列表项的标记类型。这个属性决定了显示在列表项前的标记的形状,比如实心圆、方块或是数字等。这个属性非常有用,因为它允许你改变列表标记的样式,使之更符合网页的设计需求。如果你没有指定 list-style-image,或者指定的图像无法显示,那么就会使用 list-style-type 的设置。1
2
3
4
5LI.square { list-style-type: square; }
UL.plain { list-style-type: none; }
OL { list-style-type: upper-alpha; } /* A B C D E 等 */
OL OL { list-style-type: decimal; } /* 1 2 3 4 5 等 */
OL OL OL { list-style-type: lower-roman; } /* i ii iii iv v 等 */List-Style-Image:Specifies the image that will be used as list-item marker when image loading is turned on, replacing the marker specified in the list-style-type property.
指定在图像加载开启时,将用作列表项标记的图像,替换 list-style-type 属性中指定的标记。
list-style-image 属性允许你将图像用作列表项的标记。这意味着你可以用自定义图像替换传统的列表标记,如圆点或数字。这在创建更具视觉吸引力的列表时非常有用。当图像加载被关闭时,会回退到 list-style-type 指定的标记。1
2UL.check { list-style-image: url(/LI-markers/checkmark.gif); }
UL LI.x { list-style-image: url(x.png); }List-Style-Position:Determines where the marker is placed in regard to the list item. If the value inside is used, the lines will wrap under the marker instead of being indented. outside is default.
确定标记在列表项中的位置。如果值为 inside,则行会在标记下方换行,而不是缩进。默认值为 outside。
大白话:list-style-position 属性定义列表标记的位置相对于列表内容的放置位置。它有两个可能的值:inside 和 outside。默认值是 outside,标记在内容的外部,并且列表项的文本与页面左侧对齐。如果设为 inside,标记则位于内容的内部,列表文本将环绕标记对齐,这通常会导致文本的首行缩进不同于其他行1
UL { list-style-position: inside; }
2.5 Box Properties(盒子属性)
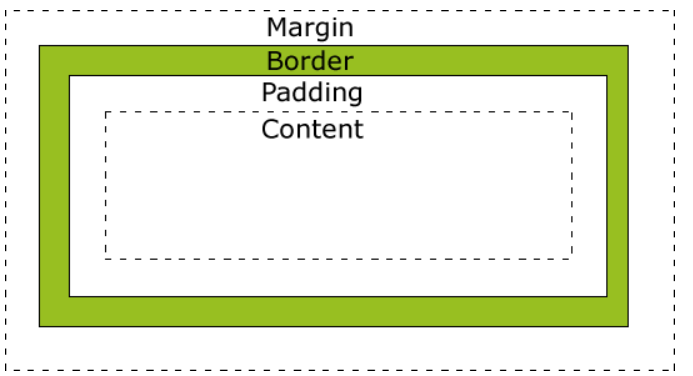
小贴士: Margin(外边距) - 清除边框外的区域,外边距是透明的Margin(外边距) - 清除边框外的区域,外边距是透明的 Border(边框) - 围绕在内边距和内容外的边框 Padding(内边距) - 清除内容周围的区域,内边距是透明的 Content(内容) - 盒子的内容,显示文本和图像
Margin-Top:Sets the top margin of an element by specifying a length or a percentage.
通过指定长度或百分比设置元素的上边距。1
BODY { margin-top: 5pt; }Margin-Right:Sets the right margin of an element by specifying a length or a percentage.
通过指定长度或百分比设置元素的右边距1
P.narrow { margin-right: 50%; }Margin-Bottom:sets the bottom margin of an element by specifying a length or a percentage.
通过指定长度或百分比设置元素的下边1
DT { margin-bottom: 3em; }Margin-Left:Sets the left margin of an element by specifying a length or a percentage.
通过指定长度或百分比设置元素的左边距1
ADDRESS { margin-left: 50%; }Margin:Sets the margins of an element by specifying top, bottom, left and right margins -- all either specifying length or percentage
通过指定上、下、左、右边距来设置元素的边距 - 都是指定长度或百分比1
2
3
4BODY { margin: 5em; } /* 所有边距 5em */
P { margin: 2em 4em; } /* 上下边距 2em,左右边距 4em */
DIV { margin: 1em 2em 3em 4em; }
/* 上边距 1em,右边距 2em,下边距 3em,左边距 4em */Padding-Top:Describes the amount of space between the top border and the content of the selector.
描述选择器的顶部边框和内容之间的空间。1
P { padding-top: 20%; }Padding-Right:Describes the amount of space between the right border and the content of the selector.
描述选择器的右边框和内容之间的空间。1
P { padding-right: 20px; }Padding-Bottom:Describes the amount of space between the bottom border and the content of the selector.
描述选择器的底部边框和内容之间的空间。1
P { padding-bottom: 5em; }Padding-Left:Describes the amount of space between the left border and the content of the selector.
描述选择器的左边框和内容之间的空间。1
P { padding-left: 15pt; }Padding:Shorthand for the padding-top, padding-right, padding-bottom,and padding-left properties.
内边距的简写属性,依次是上、右、下、左。1
BLOCKQUOTE { padding: 2em 4em 5em 4em; }Border-Top-Width:Used to specify the width of an element's top border.
用于指定元素顶部边框的宽度。1
P {border-top:20%}Border-Right-Width:Used to specify the width of an element's right border
用于指定元素右侧边框的宽度。1
P { border-right: 20%; }Border-Bottom-Width:Used to specify the width of an element's bottom border
用于指定元素底部边框的宽度1
P { border-bottom: 20%; }Border-Left-Width:Used to specify the width of an element's left border.
用于指定元素左侧边框的宽度。1
P { border-left: 20%; }Border-Width:Used to set the width of an element's border (either all borders, or specifying top border, right border, bottom border,left border).
用于设置元素的边框宽度(所有边框,或分别指定上、右、下、左边框)。1
2P { border-width: 20%; }
P { border-width: 10px 5px 10px 5px; }Border-Color:Used to set the color of an element's border.
用于设置元素边框的颜色1
P { border-color: #000000; }Border-Style:Sets style of a border - none, dotted, dashed, solid, double.
设置边框样式 - 无、点状、虚线、实线、双线。Border-Top:Sets the width, style, and color of an element's top border
设置元素顶部边框的宽度、样式和颜色1
P { border-top: 10px red double; }Border-Right:Sets the width, style, and color of an element's right border.
设置元素右侧边框的宽度、样式和颜色。1
P { border-right: 10px red double; }Border-Bottom:Sets the width, style, and color of an element's bottom border
设置元素底部边框的宽度、样式和颜色1
P { border-bottom: 10px red double; }Border-Left:Sets the width, style, and color of an element's left border
设置元素左侧边框的宽度、样式和颜色1
P { border-left: 10px red double; }Border:Sets the width, style, and color of an element's border
设置元素边框的宽度、样式和颜色1
P { border: 10px red double; }Width:Each block-level or replaced element can be given a width, specified as a length, a percentage, or as auto.
每个块级或替换元素都可以指定一个宽度,长度、百分比或自动。1
2
3P { width: 15px; }
H1 { width: 35%; }
.foo { width: auto; }Height:Each block-level or replaced element can be given a height,specified as a length or as auto.
每个块级或替换元素都可以指定一个高度,长度或自动。1
2
3P { height: 15px; }
H1 { height: 35%; }
.foo { height: auto; }Float:Allows text to wrap around an element (left, right, none).
允许文本环绕元素(左、右、无)1
2
3P { float: left; }
H1 { float: right; }
.foo { float: none; }Clear:Specifies whether an element allows floating elements to its sides (left, right, none).
指定一个元素是否允许浮动元素在其侧边(左、右、无)1
2
3P { clear: left; }
H1 { clear: right; }
.foo { clear: none; }
一个具体的例子: 1
2
3
4
5
6
7
8
9
10
11
12
13
14
15
16
17
18
19
20
21
22
23
24
25
26
27
28
29
30
31
32
33
34
35<!DOCTYPE html>
<html lang="en">
<head>
<meta charset="UTF-8">
<meta name="viewport" content="width=device-width,initial-scale=1.0">
<title>Box Model Example</title>
<style>
/*全局样式*/
div {
width: 100px; /* 设置盒子的宽度 */
height: 100px; /* 设置盒子的高度 */
margin: 20px; /* 设置盒子外边距 */
padding: 10px; /* 设置盒子内边距 */
border: 5px solid black; /* 设置盒子边框样式 */
float: left; /* 设置浮动,使盒子并排显示 */
box-sizing: border-box; /* 包括边框和内边距在内的总宽高计算 */
}
/*针对第一个盒子的特定样式*/
.box1 {
background-color:lightblue;
}
/*针对第二个盒子的特定样式*/
.box2 {
background-color:lightgreen;
clear:both;/* 清除浮动,使此盒子不并排在第一个盒子旁边 */
}
</style>
</head>
<body>
<div class="box1">Box 1</div>
<div class="box2">box 2</div>
</body>
</html>
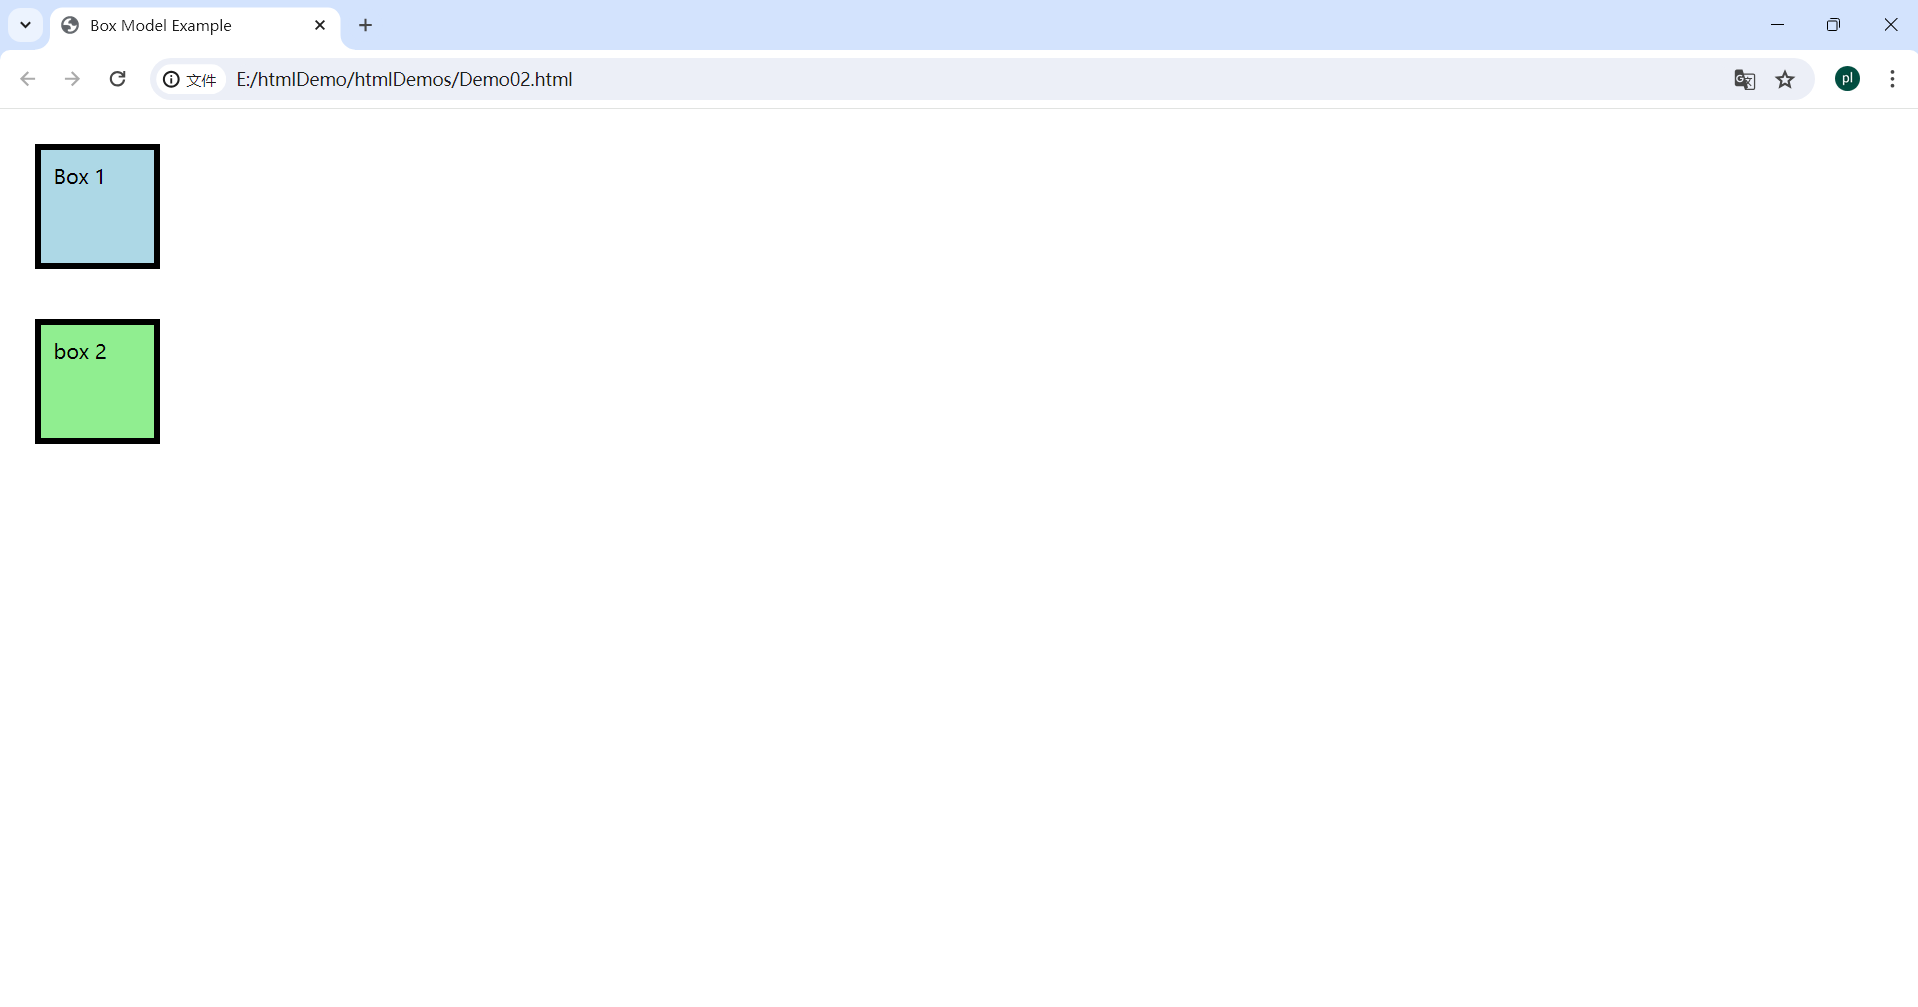
说明: * HTML 部分: *
设定了一个基本的HTML结构,包含了标题和两个盒子元素。 * CSS 部分: *
在style标签内定义了样式,包含: * 全局样式:为所有 div
设置了宽度、高度、外边距、内边距、边框和浮动属性。 * .box1 和 .box2
的特定样式,分别设置了背景颜色和清除浮动。
3. JavaScript
3.1 Syntax and Structure
- Comments
- // Single line comment
- /Multi-line comment /
- Statements
- Statements are the building blocks of a JavaScript program.
- End with a semicolon;(optional but recommended)
3.1 语法和结构
- 注释
- //单行注释
- /多行 注释/
- 语句
- 语句是JavaScript程序的构建块
- 以分号结尾;(可选但建议使用)
3.2 Variables
- Declaration var name;//Function-scoped, can be re-declared let age;//Block-scoped, cannot be re-declared within the same scope const PI = 3.14;// Block-scoped, constant value
- Initialization
- var name = "John";
- let age = 25;
- const PI = 3.14;
3.2 变量
- 声明
- var name;//函数作用域,可以重新声明
- let age;//块作用域,同一作用域不能重新声明
- const PI = 3.14;//块作用域,常数值
- 初始化
- var name = "John";
- let age = 25;
- const PI = 3.14;
3.3 Data Types
- Primitive Types
- Number: Represents both integer and floating-point numbers. Example: 42, 3.14
- String: Represents a sequence of characters. Example: "Hello", 'World'
- Boolean: Represents logical values. Example: true, false
- Null: Represents the intentional absence of any object value. Example: null
- Undefined: Represents an uninitialized variable. Example: undefined
- Symbol: Represents a unique and immutable primitive value. Example: Symbol('description')
- BigInt: Represents integers with arbitrary precision. Example: 123n
3.3 数据类型
- 原始类型
- Number:表示整数和浮点数。例如:42, 3.14
- String:表示字符序列。例如:"Hello", 'World'
- Boolean:表示逻辑值。例如:true, false
- Null:表示有意的没有任何对象值。例如:null
- Undefined:表示未初始化的变量。例如:undefined
- undefined 在 JavaScript 中代表未定义的值。当声明的变量未被初始化时,变量的默认值就是 undefined。也就是说,这个变量已经被声明了,但还没有被赋予任何值。
- undefined 也可以作为函数没有返回值的标志。例如,当一个函数没有明确的返回语句时,它默认返回 undefined。
- Symbol:表示唯一且不可变的原始值。例如:Symbol('description') * Symbol 是 ES6 引入的一种新的原始数据类型,主要用于创建唯一的标识符。Symbols 是不可变的且是唯一的,即使创建两个相同描述的 Symbol,它们也是不相等的。这使得 Symbol 成为添加属性到对象时不会出现属性名冲突的理想选择。
- BigInt:表示任意精度的整数。例如:123n
3.4 Operators
- Arithmetic Operators:+ (Addition), - (Subtraction), * (Multiplication), / (Division), % (Modulus), ++ (Increment), -- (Decrement)
- Assignment Operators:= (Assignment), += (Addition assignment), -= (Subtraction assignment), *= (Multiplication assignment), /= (Division assignment), %= (Modulus assignment)
- Comparison Operators:== (Equal to), === (Strict equal to), != (Not equal to), !== (Strict not equal to), > (Greater than), < (Less than), >= (Greater than or equal to), <= (Less than or equal to)
- Logical Operators:&& (AND), || (OR), ! (NOT)
3.4 运算符
- 算术运算符:+(加法), - (减法), * (乘法), / (除法), % (取模), ++ (自增), -- (自减)
- 赋值运算符:= (赋值), += (加法赋值), -= (减法赋值), *= (乘法赋值), /= (除法赋值), %= (取模赋值)
- 比较运算符:== (等于), === (严格等于), != (不等于), !== (严格不等于), > (大于), < (小于), >= (大于或等于), <= (小于或等于)
- 逻辑运算符:&&(与), ||(或), !(非)
3.5 Functions
- Function Declaration
- Named functions that can be called anywhere in the scope
1
2
3function greet(name) {
return "Hello " + name;
}
- Named functions that can be called anywhere in the scope
- Function Expression
- Functions assigned to variables.Can be anonymous.
1
2
3const greet = function(name) {
return "Hello " + name;
};
- Functions assigned to variables.Can be anonymous.
3.5 函数
- 函数声明
- 可在作用域内任何位置调用的命名函数
1
2
3function greet(name) {
return "Hello " + name;
}
- 可在作用域内任何位置调用的命名函数
- 函数表达式
- 分配给变量的函数。可以是匿名的
1
2
3const greet = function(name) {
return "Hello " + name;
};
- 分配给变量的函数。可以是匿名的
3.6 代码示例
1 | |
代码解释: 变量声明:使用了 var, let, 和 const 来声明和初始化变量。 函数声明和函数表达式:greet 是一个函数声明,用于生成问候语。calculate 是一个函数表达式,根据传入的操作类型执行数学运算。 算术和赋值运算符:在 calculate 函数中使用了加法 (+), 减法 (-), 乘法 (), 和除法 (/) 运算符。 输出结果:使用 console.log 输出问候语和各种数学运算的结果。 处理未定义和空值:演示了如何处理 undefined 和 null。*
小贴士:let和var的区别 1. 作用域(scope):var声明的变量具有函数作用域,这意味着在函数内部定义的变量在整个函数中都是可见的,即使是在声明之前。如果在函数外部使用 var 声明变量,该变量成为全局变量。而let声明的变量具有块级作用域,这意味着变量只在包含它的代码块(例如:循环、条件语句等)内有效。 2. 变量提升(hoisting):var变量会提升,这表示变量可以在声明之前被访问,此时变量的值是 undefined。而let变量同样被提升到块的顶部,但在声明之前访问这些变量会导致一个暂时性死区(Temporal Dead Zone, TDZ),即在声明之前访问变量会报错。 3. 重复声明(Re-dedclaration):var允许在同一作用域内多次声明同一个变量,而let在相同的作用域或块级作用域内不能重复声明同一个变量,尝试这样做将抛出一个错误。
例子:
2
3
4
5
6
7
8
9
10
11if (true) {
var varVariable = "I am var";
let letVariable = "I am let";
}
console.log(varVariable); // 输出: "I am var"
console.log(letVariable); // 报错: letVariable is not defined
var x = 10;
var x = 20; // 有效
let y = 10;
let y = 20; // 报错: Identifier 'y' has already been declared
4. jQuery
4.1 Introuduction(介绍)
- jQuery is a fast, small, and feature-rich JavaScript library.
- jQuery 是一个快速、小巧且功能丰富的 JavaScript 库。
- Simplifies HTML document traversal and manipulation, event handling, animation, and Ajax.
- 简化了 HTML 文档遍历和操作、事件处理、动画和 Ajax 的使用。
4.2 Including jQuery
- CDN
html Copy code 1
<script src="https://code.jQuery.com/jquery-3.6.0.min.js"></script>
- Local(本地)
html Copy code 1
<script src="path/to/your/jquery.min.js"></script>
4.3 Basic Syntax(基本语法)
- The basic syntax is:$(selector).action()
- 基本语法为:
$(selector).action() - $ is a shorthand for jQuery
$是 jQuery 的简写。- Selector:Finds HTML elements
- 选择器(Selector):查找 HTML 元素。
- Action:Performs an action on the elements
- 操作(Action):对元素执行操作。
4.4 Document Ready Event(文档就绪事件)
- Ensures the DOM is fully loaded before running scripts.
- 确保 DOM 完全加载后再运行脚本。
1
2
3$(document).ready(function() {
// Code to execute when the DOM is ready// 当 DOM 准备好后执行的代码
}); - Shorthand:
- 简写形式:
1
2
3$(function() {
// Code to execute when the DOM is ready// 当 DOM 准备好后执行的代码
});
4.5 Selectors(选择器)
- Element Selector(元素选择器)
1
$("p"); // Selects all <p> elements//选择所有 <p> 元素 - ID Selector(ID选择器)
1
$("#myId"); // Selects the element with id="myId"//选择 id="myId" 的元素 - Class Selector(类选择器)
1
$(".myClass"); // Selects all elements with class="myClass"//选择所有 class="myClass" 的元素
4.6 Event Handling
- Common Events
- click
1
2
3$("#myButton").click(function) {
alert("Button clicked!");
};
- click
- Mouse Events
1
2
3
4
5
6$("p").mouseenter(function() {
$(this).css("background-color", "yellow");
});
$("p").mouseleave(function() {
$(this).css("background-color", "");
}); - Keyboard Events
1
2
3$("input").keypress(function() {
console.log("Key pressed!");
});
4.6 事件处理
常见事件
- 点击事件 解释
1
2
3$("#myButton").click(function) {
alert("Button clicked!");
};
- 点击事件
$("#myButton")选择具有ID myButton的元素,通常是一个按钮。.click(function() {...})为这个按钮添加一个点击事件监听器。当用户点击这个按钮时,会执行函数内的代码。alert("Button clicked!");在用户点击按钮后显示一个警告对话框,内容为 "Button clicked!"。- 鼠标事件 解释
1
2
3
4
5
6$("p").mouseenter(function() {
$(this).css("background-color", "yellow");
});
$("p").mouseleave(function() {
$(this).css("background-color", "");
});
- 鼠标事件
$("p")选择所有<p>元素。.mouseenter(function() {...}) 为这些
<p>元素添加鼠标进入(鼠标悬停)事件监听器。当鼠标指针移入这些元素时,会执行函数内的代码。- 键盘事件 解释
1
2
3$("input").keypress(function() {
console.log("Key pressed!");
});
- 键盘事件
$("input")选择所有<input>元素。.keypress(function() {...})为这些<input>元素添加键盘按键事件监听器。当用户在这些元素中按下任意键时,函数内的代码会被执行。console.log("Key pressed!");在浏览器的控制台输出 "Key pressed!",这用于调试或向开发者提供反馈,用户看不到这个输出。
4.7 Manipulating HTML and CSS(操作HTML和CSS)
HTML Content(HTML内容)
1
2$("#myDiv").html("<p>New content</p>"); // Sets HTML content//设置HTML内容
var content = $("#myDiv").html(); // Gets HTML content//获取HTML内容Text Content(文本内容)
1
2$("#myDiv").text("New text content"); // Sets text content//设置文本内容
var text = $("#myDiv").text(); // Gets text content//获取文本内容CSS
1
2$("#myDiv").css("color", "blue"); // Sets the color to blue//设置颜色为蓝色
var color = $("#myDiv").css("color"); // Gets the color value//获取颜色值
4.8 Effects and Animations(效果和动画)
- Show/Hide(显示/隐藏)
1
2$("#myDiv").show(); // Shows the element//显示元素
$("#myDiv").hide(); // Hides the element//隐藏元素 - Fade(淡入/淡出)
1
2$("#myDiv").fadeIn(); // Fades in the element//元素淡入
$("#myDiv").fadeOut(); // Fades out the element//元素淡出 - Slide(滑动)
1
2$("#myDiv").slideDown(); // Slides down the element//元素向下滑动
$("#myDiv").slideUp(); // Slides up the element//元素向上滑动 - Animate(动画)
1
2
3
4$("#myDiv").animate({
left: '250px',
opacity: '0.5'
});
4.9 Chaininig
- jQuery allows you to chain multiple methods.
- jQuery 允许你链式调用多个方法。
1
$("#myDiv").css("color", "blue").slideUp().slideDown();
5 Bootstrap
5.1 Bootstrap Basics Review Notes
5.1.1 Introduction(介绍)
- Bootstrap is a popular front-end framework for developing responsive and mobile-first websites.
- Bootstrap是一个流行的前端框架,用于开发响应式和移动优先的网站
- It includes HTML, CSS, and JavaScript components.
- 它包括HTML,CSS和JavaScript组件
小贴士: * 响应式网站设计(Responsive Web Design):响应式网站设计(RWD)是一种网页设计方法论,其目的是使网站能够对不同的屏幕尺寸和解析度做出响应并相应地调整其布局。这意味着网站可以在桌面显示器、笔记本电脑、平板电脑以及手机上提供一致的查看体验,无需为每种设备制作不同的版本 * 移动优先设计(Mobile First Design):移动优先设计是一种策略,优先考虑移动设备的布局和设计,在此基础上扩展至桌面版视图。这种设计策略的主要原因是移动互联网使用已超过桌面互联网使用,许多设计师和开发者选择优先为小屏幕优化其网站。
5.1.2 Including Bootstrap
- CDN
CSS
1
<link href="https://maxcdn.bootstrapcdn.com/bootstrap/4.6.0/css/bootstrap.min.css" rel="stylesheet">JS
1
2
3<script src="https://code.jquery.com/jquery-3.5.1.slim.min.js"></script>
<script src="https://cdn.jsdelivr.net/npm/@popperjs/core@2.5.4/dist/umd/popper.min.js"></script>
<script src="https://maxcdn.bootstrapcdn.com/bootstrap/4.6.0/js/bootstrap.min.js"></script>
- Local
- Download from getbootstrap.com and include the files in your project.
5.1.3 Basic Structure
- HTML Template(HTML模板)
1
2
3
4
5
6
7
8
9
10
11
12
13
14
15
16<!DOCTYPE html>
<html lang="en">
<head>
<meta charset="UTF-8">
<meta name="viewport" content="width=device-width, initial-scale=1.0">
<title>Bootstrap Example</title>
<link href="https://maxcdn.bootstrapcdn.com/bootstrap/4.6.0/css/bootstrap.min.css" rel="stylesheet">
</head>
<body>
<h1>Hello, world!</h1>
<script src="https://code.jquery.com/jquery-3.5.1.slim.min.js"></script>
<script src="https://cdn.jsdelivr.net/npm/@popperjs/core@2.5.4/dist/umd/popper.min.js"></script>
<script src="https://maxcdn.bootstrapcdn.com/bootstrap/4.6.0/js/bootstrap.min.js"></script>
</body>
</html>
5.1.4 Grid System(网格系统)
- Bootstrap's grid system uses a series of containers, rows, and columns to layout and align content.
- Bootstrap 的网格系统使用一系列容器、行和列来布局和对齐内容。
1 | |
- Containers(容器)
.containerfor a responsive fixed-width container..container用于响应式固定宽度容器.container-fluidfor a full-width container, spanning the entire width of the viewport..container-fluid用于全宽容器,覆盖视口的整个宽度
- Columns(列)
.col-*用于响应式列(例如,.col-6为50%宽度).col-sm-*,.col-md-*,.col-lg-*,.col-xl-*用于不同的断点
小贴士:理解断点(Breakpoints) 在Bootstrap中,断点是媒体查询的预设尺寸,定义了在不同的屏幕宽度下布局应该如何变化。这些断点主要对应不同种类的设备屏幕尺寸,如手机、平板电脑、桌面显示器等。
5.1.5 Typography(排版)
- Headings(标题)
1
2
3<h1>h1. Bootstrap heading</h1>
<h2>h2. Bootstrap heading</h2>
<!-- and so on --> - Lead(引导段落)
1
<p class="lead">This is a lead paragraph</p> - Text Utilities(文本工具)
1
2
3
4
5
6<p class="text-muted">Muted text.</p>
<p class="text-primary">Primary text.</p>
<p class="text-success">Success text.</p>
<p class="text-info">Info text.</p>
<p class="text-warning">Warning text.</p>
<p class="text-danger">Danger text.</p>
5.1.6 Components(组件)
- Buttons(按钮)
1
2
3<button type="button" class="btn btn-primary">Primary</button>
<button type="button" class="btn btn-secondary">Secondary</button>
<button type="button" class="btn btn-success">Success</button>
5.1.7 Forms(表单)
- Basic Form(基本表单)
1
2
3
4
5
6
7
8
9
10
11
12
13
14
15
16<form>
<div class="form-group">
<label for="exampleInputEmail1">Email address</label>
<input type="email" class="form-control" id="exampleInputEmail1" aria-describedby="emailHelp">
<small id="emailHelp" class="form-text text-muted">We'll never share your email with anyone else.</small>
</div>
<div class="form-group">
<label for="exampleInputPassword1">Password</label>
<input type="password" class="form-control" id="exampleInputPassword1">
</div>
<div class="form-check">
<input type="checkbox" class="form-check-input" id="exampleCheck1">
<label class="form-check-label" for="exampleCheck1">Check me out</label>
</div>
<button type="submit" class="btn btn-primary">Submit</button>
</form>
5.1.8 Utilities(实用工具类)
- Spacing(间距)
1
2<div class="mb-3">Margin bottom</div>
<div class="p-3">Padding</div> - Text Alignment(文本对齐)
1
2
3<div class="text-left">Left aligned text</div>
<div class="text-center">Center aligned text</div>
<div class="text-right">Right aligned text</div> - Display Property
1
2
3<div class="d-none">Hidden</div>
<div class="d-block">Block</div>
<div class="d-inline">Inline</div>
5.2 Bootstrap4 Cheatsheet
5.2.1 Breakpoints(断点)
- Extra small < 544px
- Small ≥ 544px
- Medium ≥ 768px
- Large ≥ 992px
- Extra Large ≥ 1200px
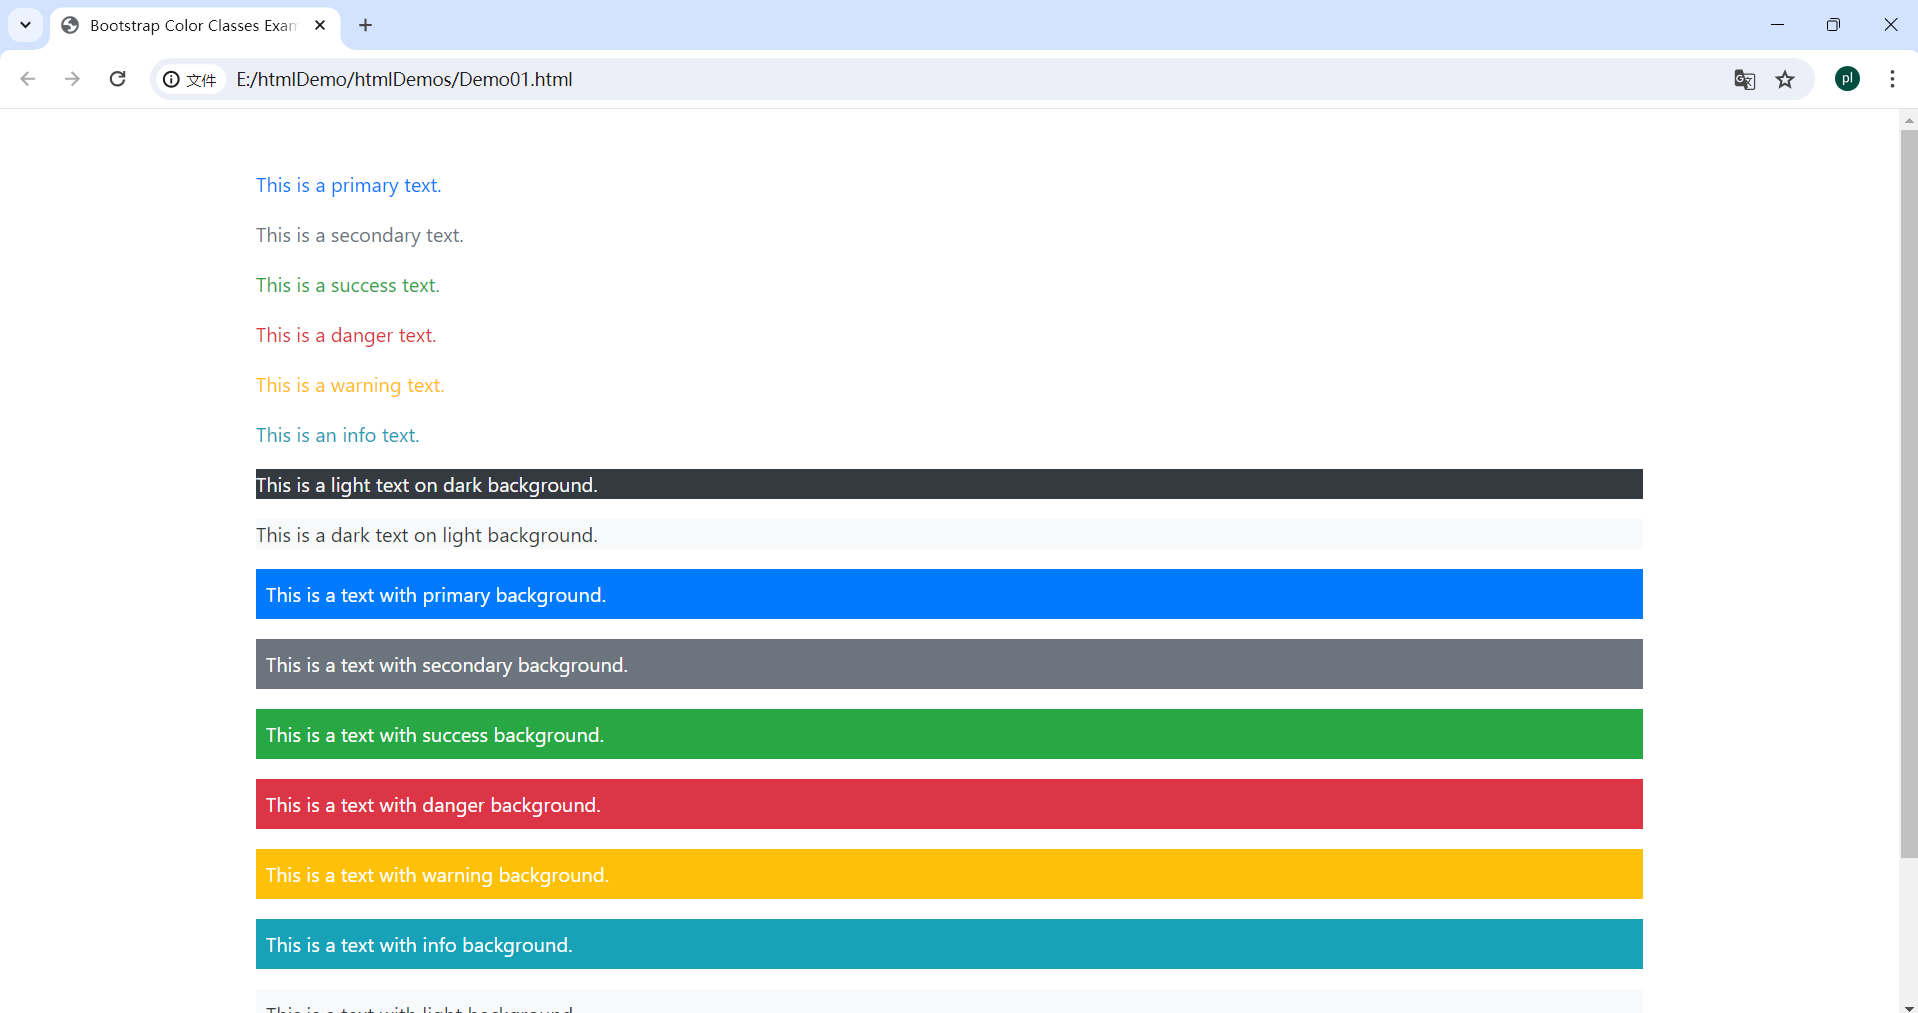
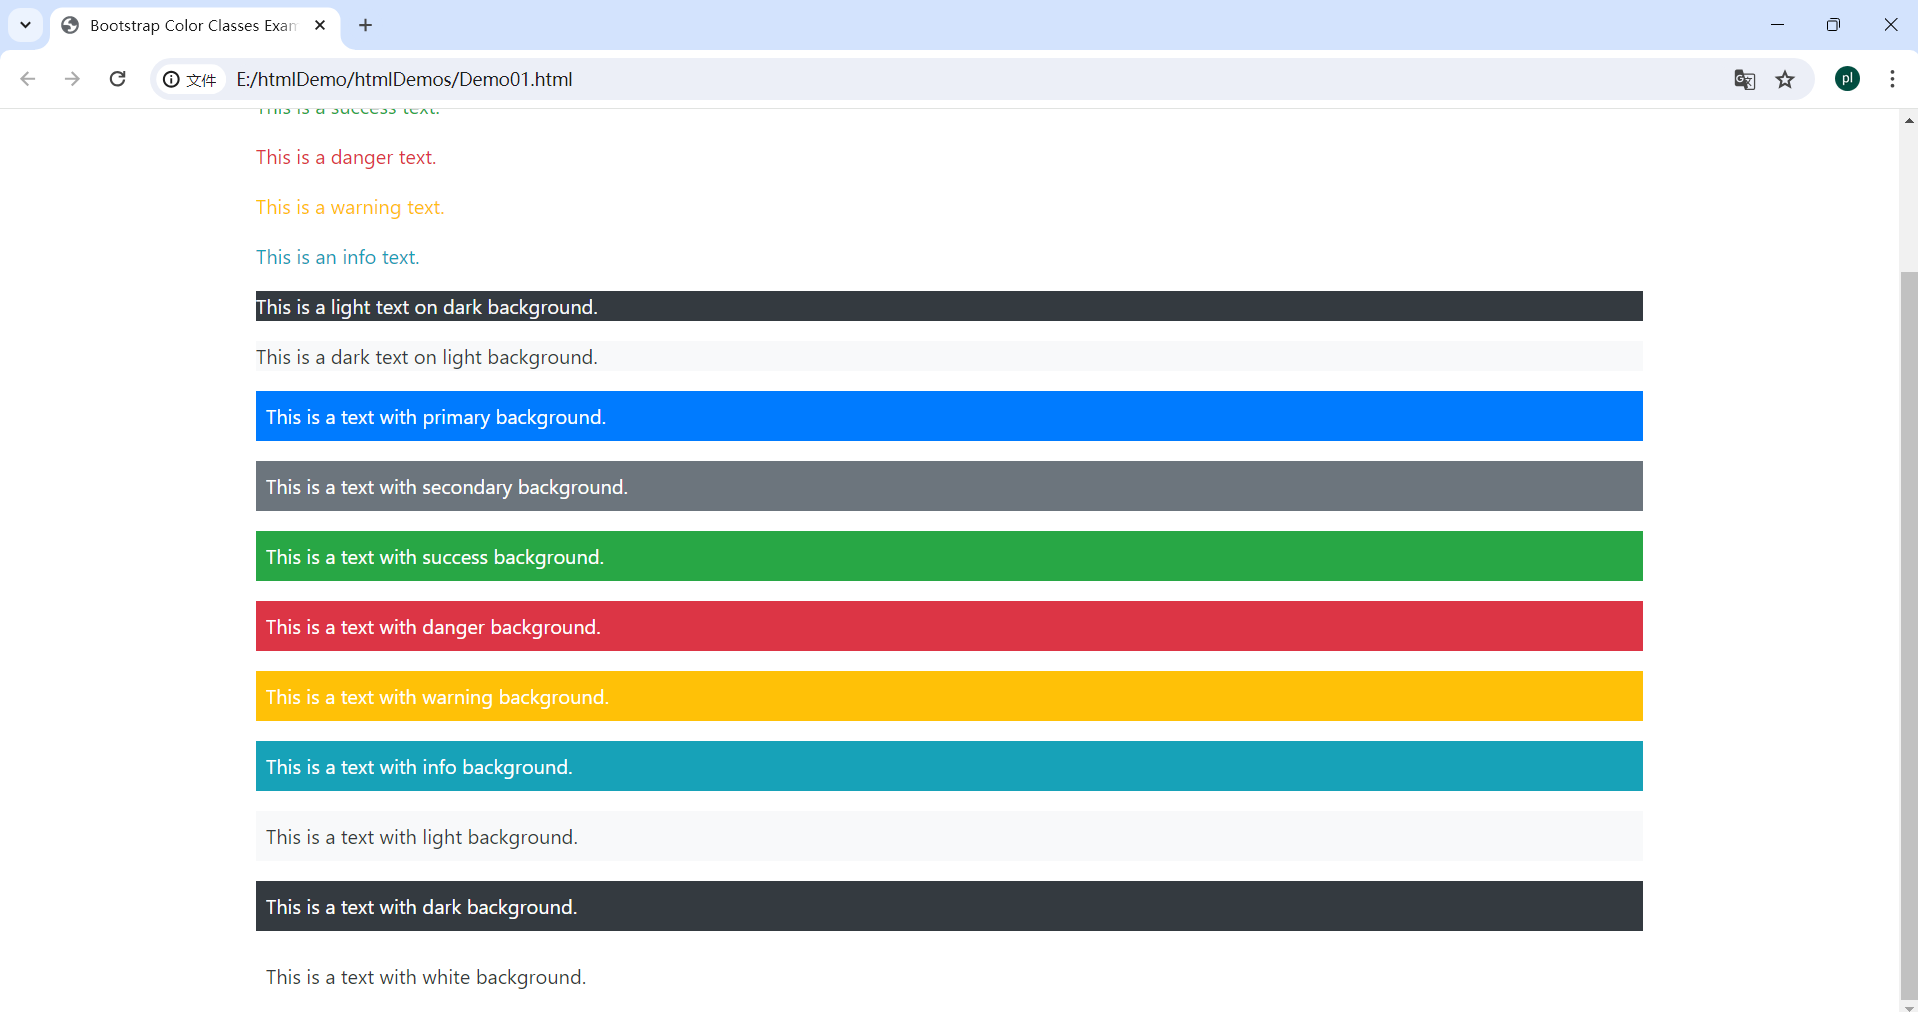
5.2.2 Colors(颜色)
.text-primary.text-secondary.text-success.text-danger.text-warning.text-info.text-light.text-dark.bg-primary.bg-secondary.bg-success.bg-danger.bg-warning.bg-info.bg-light.bg-dark.bg-white
小贴士 文本颜色类 (text-):
.text-primary,.text-secondary,.text-success,.text-danger,.text-warning,.text-info,.text-light, 和.text-dark分别将段落的文本颜色设置为主题的基本颜色、次要颜色、成功颜色(通常是绿色)、危险颜色(通常是红色)、警告颜色(通常是黄色)、信息颜色(通常是浅蓝色)、浅色(用于深色背景)、和深色(用于浅色背景)。 背景颜色类 (bg-):.bg-primary,.bg-secondary,.bg-success,.bg-danger,.bg-warning,.bg-info,.bg-light,.bg-dark, 和.bg-white用于设置背景颜色,通常与text-white或text-dark搭配使用以保证足够的对比,从而确保文本可读性。
一个具体的例子: 1
2
3
4
5
6
7
8
9
10
11
12
13
14
15
16
17
18
19
20
21
22
23
24
25
26
27
28
29
30<!DOCTYPE html>
<html lang="en">
<head>
<meta charset="UTF-8">
<meta name="viewport" content="width=device-width, initial-scale=1.0">
<title>Bootstrap Color Classes Example</title>
<link href="https://stackpath.bootstrapcdn.com/bootstrap/4.5.2/css/bootstrap.min.css" rel="stylesheet">
</head>
<body>
<div class="container mt-5">
<p class="text-primary">This is a primary text.</p>
<p class="text-secondary">This is a secondary text.</p>
<p class="text-success">This is a success text.</p>
<p class="text-danger">This is a danger text.</p>
<p class="text-warning">This is a warning text.</p>
<p class="text-info">This is an info text.</p>
<p class="text-light bg-dark">This is a light text on dark background.</p>
<p class="text-dark bg-light">This is a dark text on light background.</p>
<p class="bg-primary text-white p-2">This is a text with primary background.</p>
<p class="bg-secondary text-white p-2">This is a text with secondary background.</p>
<p class="bg-success text-white p-2">This is a text with success background.</p>
<p class="bg-danger text-white p-2">This is a text with danger background.</p>
<p class="bg-warning text-white p-2">This is a text with warning background.</p>
<p class="bg-info text-white p-2">This is a text with info background.</p>
<p class="bg-light text-dark p-2">This is a text with light background.</p>
<p class="bg-dark text-white p-2">This is a text with dark background.</p>
<p class="bg-white text-dark p-2">This is a text with white background.</p>
</div>
</body>
</html>
5.2.3 Typography(排版)
.text-left: Left aligned text(左对齐文本).text-center: Center aligned text(居中对齐文本).text-right: Right aligned text(右对齐文本).text-justify: Justified text(两端对齐文本).text-nowrap: No wrap text(禁止文本换行).text-lowercause: Lowercase text(将文本转换为小写).text-uppercase: Uppercase text(将文本转换为大写).text-capitalize: Capitalized text(将文本中每个单词首字母大写).lead: Good for first paragraph of articl(适合用作文章的第一段)- 通常文本会大一些,用于引导读者进入文章内容
5.2.4 Lists(列表)
list-unstyled:Removes default list margin(移除默认的列表外边距)- 通常用于移除
<ul>或<ol>的默认列表样式,如前面的项目符号或数字。
- 通常用于移除
.dl-horizontal:Makes list items two columns(将定义列表<dl>的项显示为两列)- 通常用于使术语和描述并排显示,而不是上下排列。
.list-inline:Makes list items inline(使列表项<li>呈行内(inline)显示)- 可以将所有列表项放在一行显示,而不是默认的垂直堆叠。
.list-inline-item:Added to each li(应添加到每个行内列表项<li>上)- 当使用
.list-inline时,此类确保列表项正确地显示在同一行内。
- 当使用
Example
1 | |
一个具体的例子
1 | |
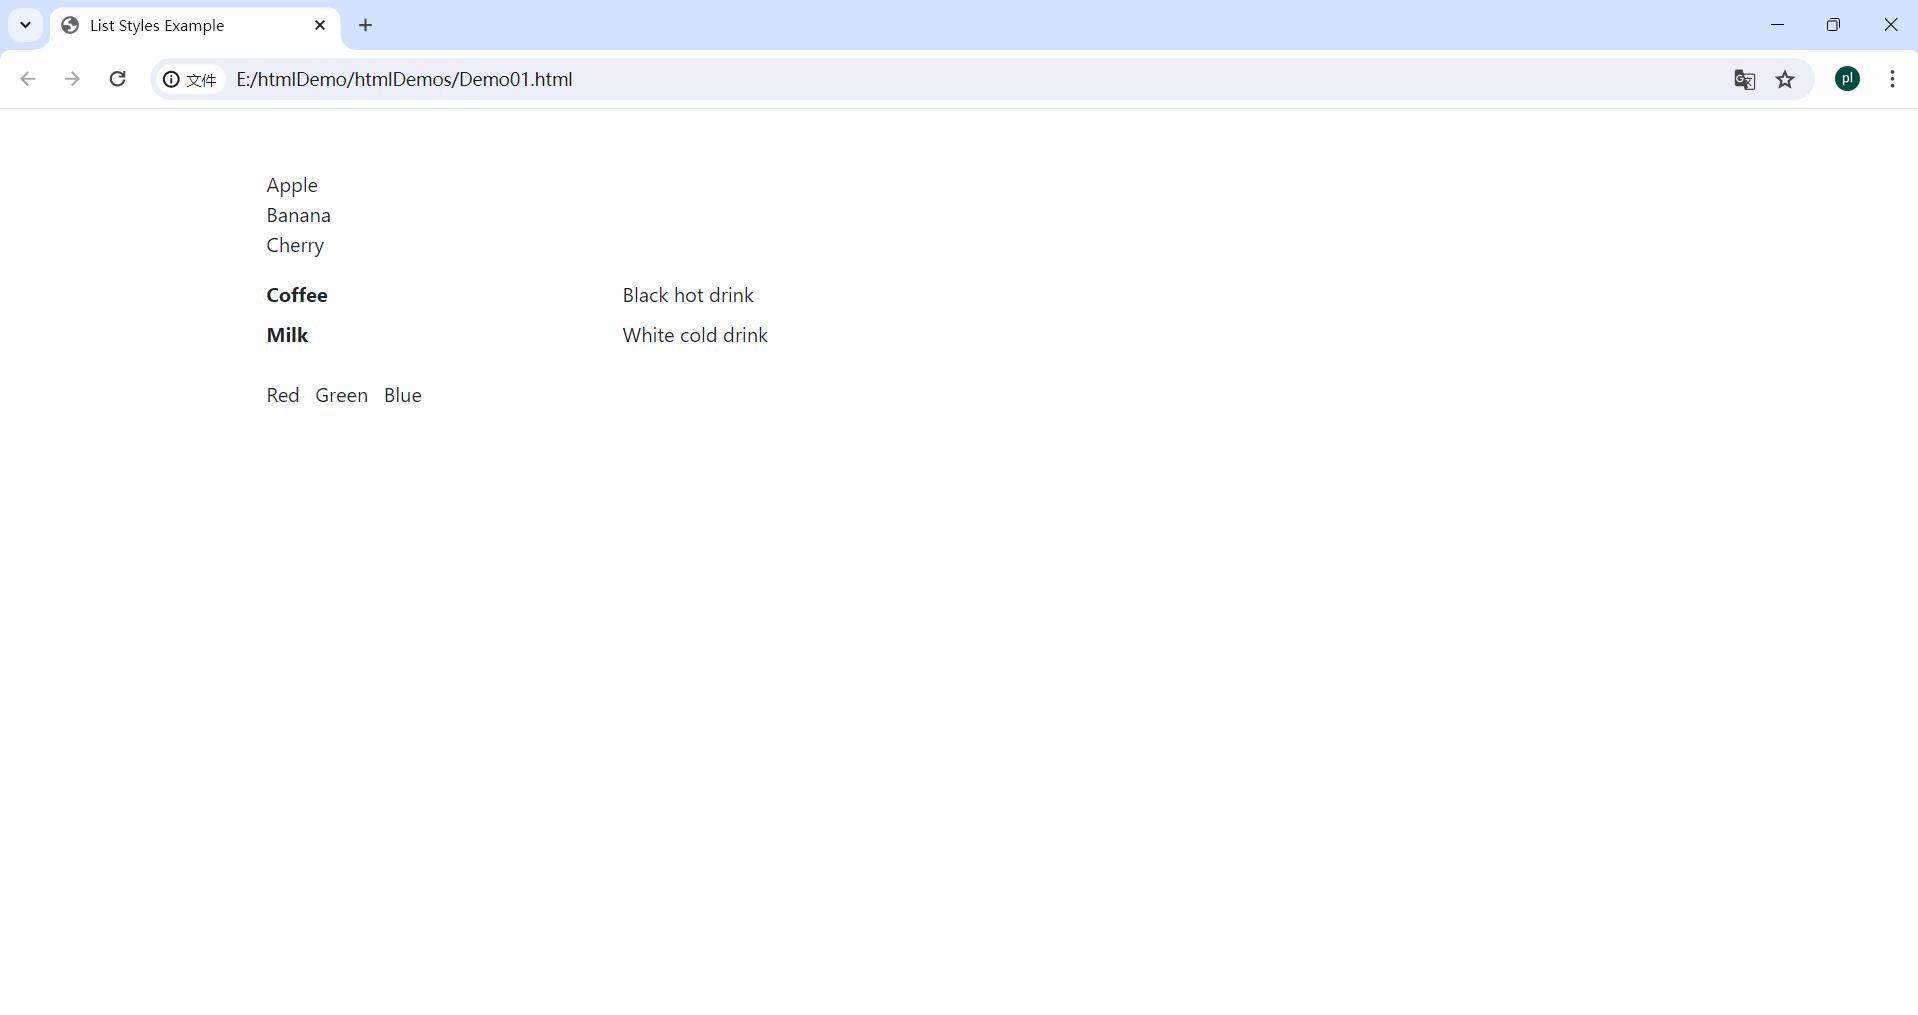
说明: 1. 无样式列表 (list-unstyled):
这个无序列表 <ul> 使用 .list-unstyled
类来移除默认的内边距和列表项目符号,使得列表项纯粹呈现内容。 2.
横向定义列表 (dl-horizontal): 在Bootstrap
4中,dl-horizontal 类已被移除,取而代之的是使用带 .row 类的
<dl> 和 .col-sm-* 类的 <dt> 和
<dd>。这种方式使定义列表的术语
<dt> 和描述 <dd>
并排显示,形成两列布局。
5.2.5 Blockquote
1 | |
5.2.6 Headings
1 | |
5.2.7 Images
.img-fluid:Make an image responsive(使图像响应式).rounded:Adds rounded corners to image(为图像添加圆角).rounded-circle:Crops image to be circle(将图像裁剪为圆形).img-thumbnail:Adds rounded corner + border(为图像添加圆角和边框)
5.2.8 Floats(浮动)
.float-left:Floats items left(将元素浮动到左侧).float-right:Floats items right(将元素浮动到右侧).float-none:Removes float(移除元素的浮动属性)- 这个类用于取消元素的任何浮动效果,使元素回归到正常的文档流中。
.float-*-*:Add breakpoints if needed( 在断点处添加浮动)- 这种模式的类用于响应式设计,允许在特定的屏幕尺寸断点上应用浮动属性
- 例如,
.float-md-left表示在中等尺寸的屏幕上将元素浮动到左侧。
5.2.9 Starter Template(启动模板)
1 | |
5.2.10 One Column Centered Grid(一列居中网格)
1 | |
5.2.11 Two Column Grid(两列网格)
1 | |
5.2.12 Three Column Grid(三列网格)
1 | |
5.2.13 Four Column Grid(四列网格)
1 | |
5.2.14 Forms(表格)
1 | |
5.2.15 Buttons(按钮)
.btn:Needs to be added to all buttons because it adds padding and margin(需要添加到所有按钮上,因为它增加了内边距和外边距).btn-*: primary, secondary, success, danger, warning, info, light, dark, link(表示按钮的不同样式,其中 * 可以是 primary、secondary、success、danger、warning、info、light、dark、link。).btn-outline-*:primary, secondary, success, danger, warning, info, light, dark, link(边框样式按钮,其中 * 可以是 primary、secondary、success、danger、warning、info、light、dark、link).btn-lg:Large buttom(大号按钮).btn-sm:Smaller than default button(小号按钮)
1 | |
5.2.16 Tables(表)
1 | |
6.代码解析
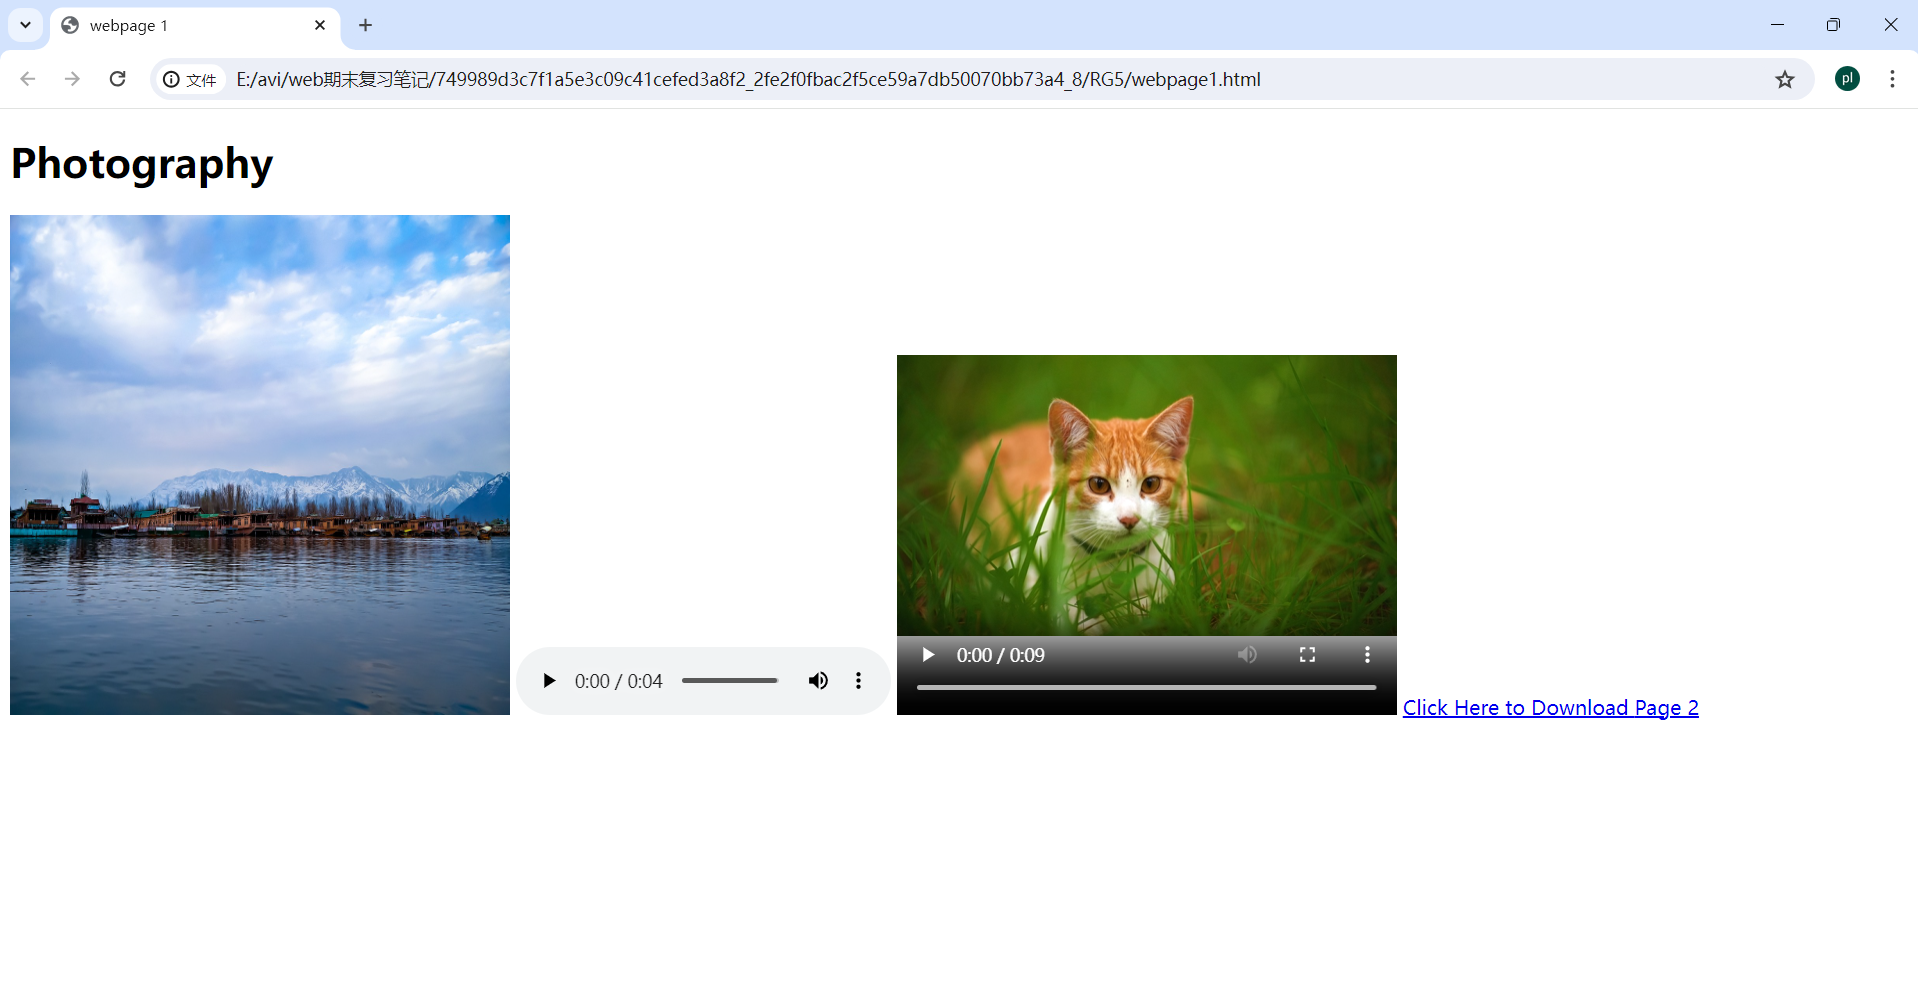
6.1 webpage1
1 | |
6.2 webpage2
1 | |
6.3 webpage3
1 | |

6.4 inLINECSS
1 | |
6.5 External CSS
1 | |

6.6 InternalCSS
1 | |

6.7 CssFontProperties
1 | |

6.8 CssSelectors
1 | |

6.9 Cssproperties
1 | |
![效果图] (/images/Cssproperties.png)
6.10 DIV
1 | |
